SPF is an e-mail anti-forgery technology the enables domain owners to list, in the Domain Name Service (DNS), authorized sources of mail from their domains. It enables mail receivers to reject mail that does not come from authorized sources. This guide describes the second part of the protocol, rejecting mail from unauthorized sources. It assumes you have your Postfix set up and running. Setting up and running Postfix is described elsewhere in the wiki and in the Postfix documentation.
Step 1: Install Packages
The ModSecurity module for Apache is included in the default Debian/Ubuntu repository. To install it, run
# sudo apt install postfix-policyd-spf-python postfix-pcre
Step 2: Configure DNS
Example 1 – Allow all MX Servers
v=spf1 mx -allExample 2 – Allow from specific host
v=spf1 a:mail.example.com -all- The
v=spf1tag is required and has to be the first tag. - The last tag,
-all, indicates that mail from your domain should only come from servers identified in the SPF string. Anything coming from any other source is forging your domain. An alternative is~all, indicating the same thing but also indicating that mail servers should accept the message and flag it as forged instead of rejecting it outright.-allmakes it harder for spammers to forge your domain successfully; it is the recommended setting.~allreduces the chances of email getting lost because an incorrect mail server was used to send mail.~allcan be used if you don’t want to take chances.
The tags between identify eligible servers from which email to your domain can originate.
mxis a shorthand for all the hosts listed in MX records for your domain. If you’ve got a solitary mail server,mxis probably the best option. If you’ve got a backup mail server (a second MX record), usingmxwon’t cause any problems. Your backup mail server will be identified as an authorized source for email although it will probably never send any.- The
atag lets you identify a specific host by name or IP address, letting you specify which hosts are authorized. You’d useaif you wanted to prevent the backup mail server from sending outgoing mail or if you wanted to identify hosts other than your own mail server that could send mail from your domain (e.g., putting your ISP’s outgoing mail servers in the list so they’d be recognized when you had to send mail through them).
Step 3: Postfix Integration
If you are using SpamAssassin to filter spam, you may want to edit /etc/postfix-policyd-spf-python/policyd-spf.conf to change the HELO_reject and Mail_From_reject settings to False. This edit will cause the SPF policy agent to run its tests and add a message header with the results in it while not rejecting any messages. You may also want to make this change if you want to see the results of the checks but not actually apply them to mail processing. Otherwise, just go with the standard settings.
postconf -M policyd-spf/spawn="policyd-spf  unix  -       n       n       -       0       spawn user=nobody argv=/usr/bin/policyd-spf"
postconf -e "policyd-spf_time_limit = 3600"
Edit /etc/postfix-policyd-spf-python/policyd-spf.conf define the skip_address list
skip_addresses = 127.0.0.0/8,::ffff:127.0.0.0/104,::1,192.168.0.0/16
Restart Postfix and test configuration and monitor the log file
# sudo systemctl restart postfix
Step 4: Check configuration?
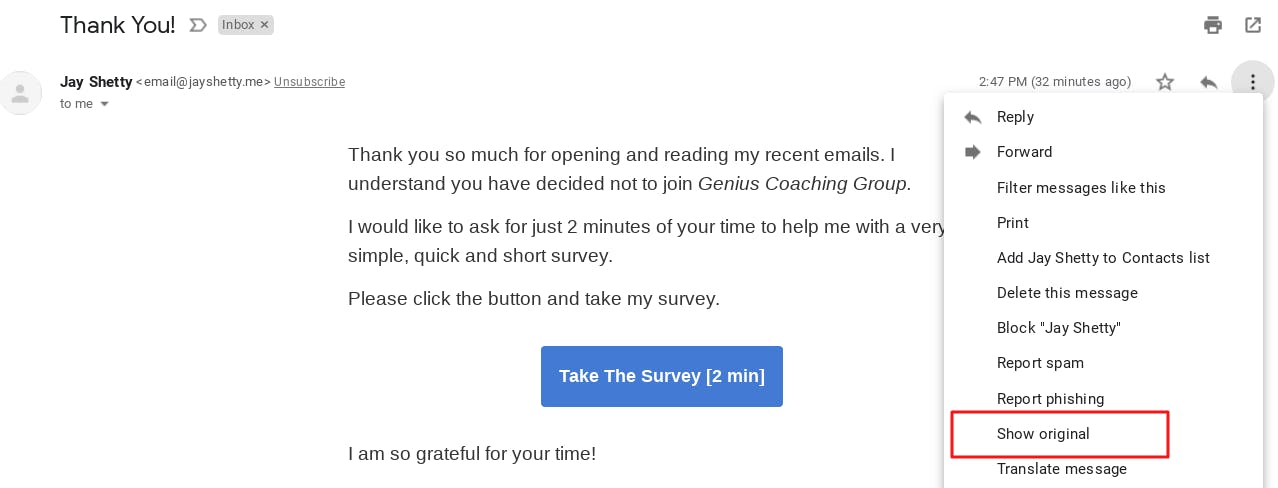
Open any of the email sent via your postfix to Gmail and click on Show original link as shown below:
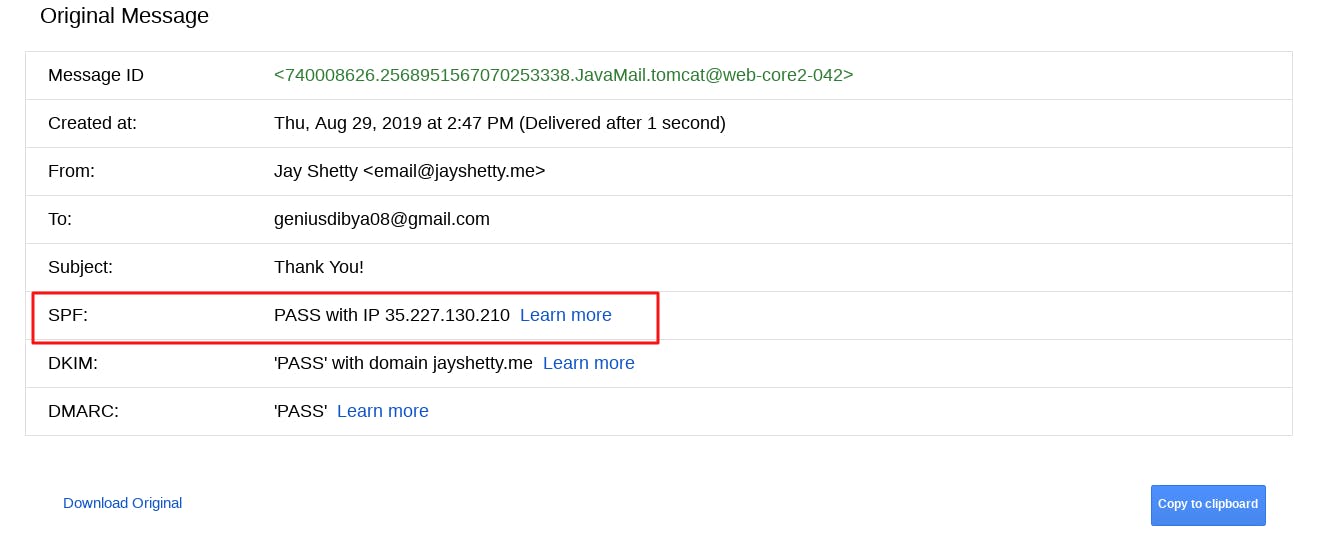
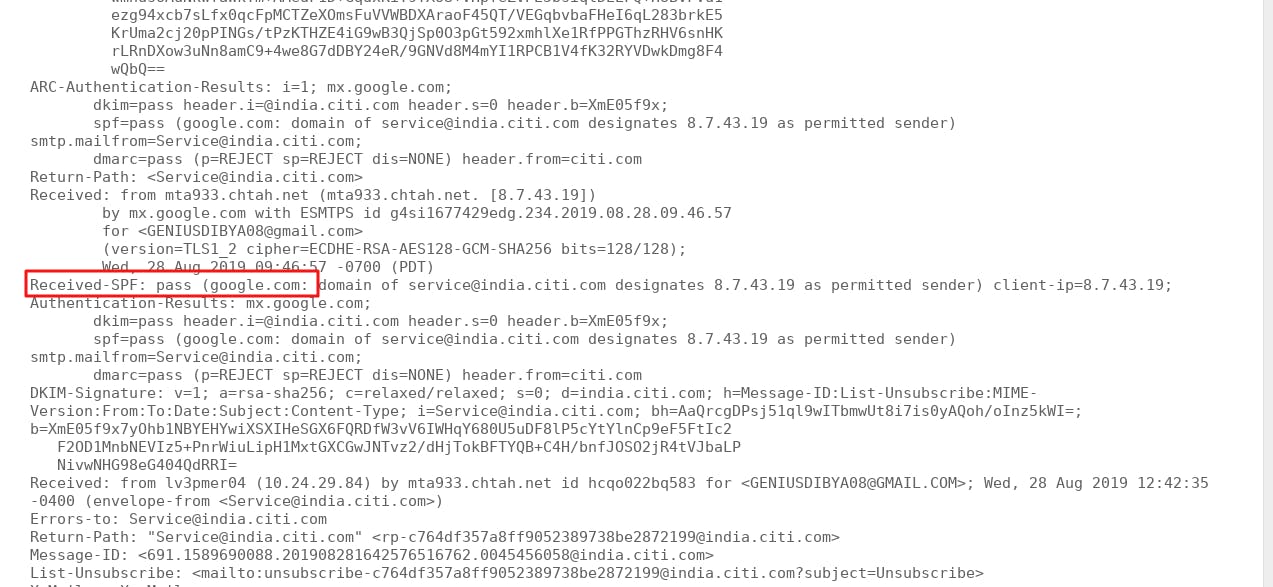
Next, you will see a window like the one below, where you will see the status of SPF (whether Pass or Fail) in Gmail. If you see the below line, then this means SPF is pass: